
Table merupakan komponen untuk menyajikan data dalam bentuk tabular. Android sudah menyediakan component tersendiri dengan nama Table Layout dan dipadukan dengan class TableRow. Keuntungan menggunakan TableRow yaitu memudahkan akses lanjutan seperti action listener. Untuk tutorialnya kita akan gunakan sebuah class POJO/entitas (setter/getter) namun kalian juga bisa menggunakan teknik lain, ini hanya sekedar contoh saja cara menggunakan table pada android studio.
Membuat class entitas product
Contents
Kita mulai dari membuat class entitas product dengan implementasi serialisasi tentunya.
public class Product implements Serializable {

    private String id;

    private String name;

    private double price;

    private String description;

    private int photo;

    public String getId() {
        return this.id;
    }

    public void setId(String id) {
        this.id = id;
    }

    public String getName() {
        return this.name;
    }

    public void setName(String name) {
        this.name = name;
    }

    public double getPrice() {
        return this.price;
    }

    public void setPrice(double price) {
        this.price = price;
    }

    public String getDescription() {
        return this.description;
    }

    public void setDescription(String description) {
        this.description = description;
    }

    public int getPhoto() {
        return this.photo;
    }

    public void setPhoto(int photo) {
        this.photo = photo;
    }

    public Product() {
    }

    public Product(String id, String name, double price, String description, int photo) {
        this.id = id;
        this.name = name;
        this.price = price;
        this.description = description;
        this.photo = photo;
    }
}
Tambahkan Gambar di Drawble
Agar nanti tampilkan table menarik, kita letakan gambar sebagai demo yaitu drawable/flower.png

Activity Layout
Kita buat activity Layout sederhana saja tanpa ada tombol yang berguna untuk menampilkan data table. Jangan lupa untuk menggunakan Scroll View
<?xml version="1.0" encoding="utf-8"?>
<androidx.constraintlayout.widget.ConstraintLayout xmlns:android="http://schemas.android.com/apk/res/android"
    xmlns:app="http://schemas.android.com/apk/res-auto"
    xmlns:tools="http://schemas.android.com/tools"
    android:layout_width="match_parent"
    android:layout_height="match_parent"
    tools:context=".MainActivity3">
    <ScrollView
        android:layout_width="match_parent"
        android:layout_height="match_parent"
        tools:ignore="MissingConstraints">
        <TableLayout
            android:id="@+id/tableLayoutProduct"
            android:layout_width="fill_parent"
            android:layout_height="fill_parent">
        </TableLayout>
    </ScrollView>

</androidx.constraintlayout.widget.ConstraintLayout>
Main Activity
Pada main activity akan dibuat beberapa method yaitu
- initView() untuk init component TableLayout
- loadData() untuk init item product
- createColumn() untuk membuat column
- fillData() untuk mengisi data table yang didalamnya juga kita tambahkan action listener
public class MainActivity3 extends AppCompatActivity {

    private TableLayout tableLayout;
    @Override
    protected void onCreate(Bundle savedInstanceState) {
        super.onCreate(savedInstanceState);
        setContentView(R.layout.activity_main3);
        initView();
        loadData();
    }
    private void initView() {
        tableLayout = (TableLayout) findViewById(R.id.tableLayoutProduct);
    }

    private void loadData() {
        List<Product> products = new ArrayList<Product>();
        products.add(new Product("p01", "Name 1", 4, "Product 1", R.drawable.flower));
        products.add(new Product("p02", "Name 2", 8, "Product 2", R.drawable.flower));
        products.add(new Product("p03", "Name 3", 9, "Product 3", R.drawable.flower));
        products.add(new Product("p04", "Name 4", 11, "Product 4", R.drawable.flower));
        products.add(new Product("p05", "Name 5", 5, "Product 5", R.drawable.flower));
        products.add(new Product("p06", "Name 6", 21, "Product 6", R.drawable.flower));
        products.add(new Product("p07", "Name 7", 15, "Product 7", R.drawable.flower));
        products.add(new Product("p08", "Name 8", 8, "Product 8", R.drawable.flower));
        products.add(new Product("p09", "Name 9", 32, "Product 9", R.drawable.flower));

        createColumns();

        fillData(products);

    }

    private void createColumns() {
        TableRow tableRow = new TableRow(this);
        tableRow.setLayoutParams(new TableRow.LayoutParams(
                TableRow.LayoutParams.MATCH_PARENT,
                TableRow.LayoutParams.WRAP_CONTENT));

        // Id Column
        TextView textViewId = new TextView(this);
        textViewId.setText("Id");
        textViewId.setTypeface(Typeface.DEFAULT, Typeface.BOLD);
        textViewId.setPadding(5, 5, 5, 0);
        tableRow.addView(textViewId);

        // Name Column
        TextView textViewName = new TextView(this);
        textViewName.setText("Name");
        textViewName.setTypeface(Typeface.DEFAULT, Typeface.BOLD);
        textViewName.setPadding(5, 5, 5, 0);
        tableRow.addView(textViewName);

        // Price Column
        TextView textViewPrice = new TextView(this);
        textViewPrice.setText("Price");
        textViewPrice.setTypeface(Typeface.DEFAULT, Typeface.BOLD);
        textViewPrice.setPadding(5, 5, 5, 0);
        tableRow.addView(textViewPrice);

        // Photo Column
        TextView textViewPhoto = new TextView(this);
        textViewPhoto.setText("Photo");
        textViewPhoto.setTypeface(Typeface.DEFAULT, Typeface.BOLD);
        textViewPhoto.setPadding(5, 5, 5, 0);
        tableRow.addView(textViewPhoto);

        tableLayout.addView(tableRow, new TableLayout.LayoutParams(
                TableRow.LayoutParams.FILL_PARENT,
                TableRow.LayoutParams.WRAP_CONTENT));

        // Add Divider
        tableRow = new TableRow(this);
        tableRow.setLayoutParams(new TableRow.LayoutParams(
                TableRow.LayoutParams.FILL_PARENT,
                TableRow.LayoutParams.WRAP_CONTENT));

        // Id Column
        textViewId = new TextView(this);
        textViewId.setText("-----------");
        textViewId.setTypeface(Typeface.DEFAULT, Typeface.BOLD);
        textViewId.setPadding(5, 5, 5, 0);
        tableRow.addView(textViewId);

        // Name Column
        textViewName = new TextView(this);
        textViewName.setText("-----------");
        textViewName.setTypeface(Typeface.DEFAULT, Typeface.BOLD);
        textViewName.setPadding(5, 5, 5, 0);
        tableRow.addView(textViewName);

        // Price Column
        textViewPrice = new TextView(this);
        textViewPrice.setText("-----------");
        textViewPrice.setTypeface(Typeface.DEFAULT, Typeface.BOLD);
        textViewPrice.setPadding(5, 5, 5, 0);
        tableRow.addView(textViewPrice);

        // Photo Column
        textViewPhoto = new TextView(this);
        textViewPhoto.setText("-------------------------");
        textViewPhoto.setTypeface(Typeface.DEFAULT, Typeface.BOLD);
        textViewPhoto.setPadding(5, 5, 5, 0);
        tableRow.addView(textViewPhoto);

        tableLayout.addView(tableRow, new TableLayout.LayoutParams(
                TableRow.LayoutParams.MATCH_PARENT,
                TableRow.LayoutParams.WRAP_CONTENT));

    }

    private void fillData(List<Product> products) {
        int i = 0;
        for (Product product : products) {
            System.out.println("urutan "+i);
            TableRow tableRow = new TableRow(this);
            tableRow.setLayoutParams(new TableRow.LayoutParams(
                    TableRow.LayoutParams.MATCH_PARENT,
                    TableRow.LayoutParams.WRAP_CONTENT));

            tableRow.setOnClickListener(new View.OnClickListener() {
                @Override
                public void onClick(View view) {
                    TableRow currentRow = (TableRow) view;
                    TextView textViewId = (TextView) currentRow.getChildAt(0);
                    String id = textViewId.getText().toString();
                    Toast.makeText(getApplicationContext(), id, Toast.LENGTH_LONG).show();
                }
            });

            // Id Column
            TextView textViewId = new TextView(this);
            textViewId.setText(product.getId());
            textViewId.setTypeface(Typeface.DEFAULT, Typeface.BOLD);
            textViewId.setPadding(5, 5, 5, 0);
            tableRow.addView(textViewId);

            // Name Column
            TextView textViewName = new TextView(this);
            textViewName.setText(product.getName());
            textViewName.setTypeface(Typeface.DEFAULT, Typeface.BOLD);
            textViewName.setPadding(5, 5, 5, 0);
            tableRow.addView(textViewName);

            // Price Column
            TextView textViewPrice = new TextView(this);
            textViewPrice.setText("Rp "+ String.valueOf(product.getPrice()));
            textViewPrice.setTypeface(Typeface.DEFAULT, Typeface.BOLD);
            textViewPrice.setPadding(5, 5, 5, 0);
            tableRow.addView(textViewPrice);

            // Photo Column
            ImageView imageViewPhoto = new ImageView(this);
            imageViewPhoto.setImageResource(product.getPhoto());
            tableRow.addView(imageViewPhoto);

            tableLayout.addView(tableRow, new TableLayout.LayoutParams(
                    TableRow.LayoutParams.MATCH_PARENT,
                    TableRow.LayoutParams.WRAP_CONTENT));
        }
    }
}
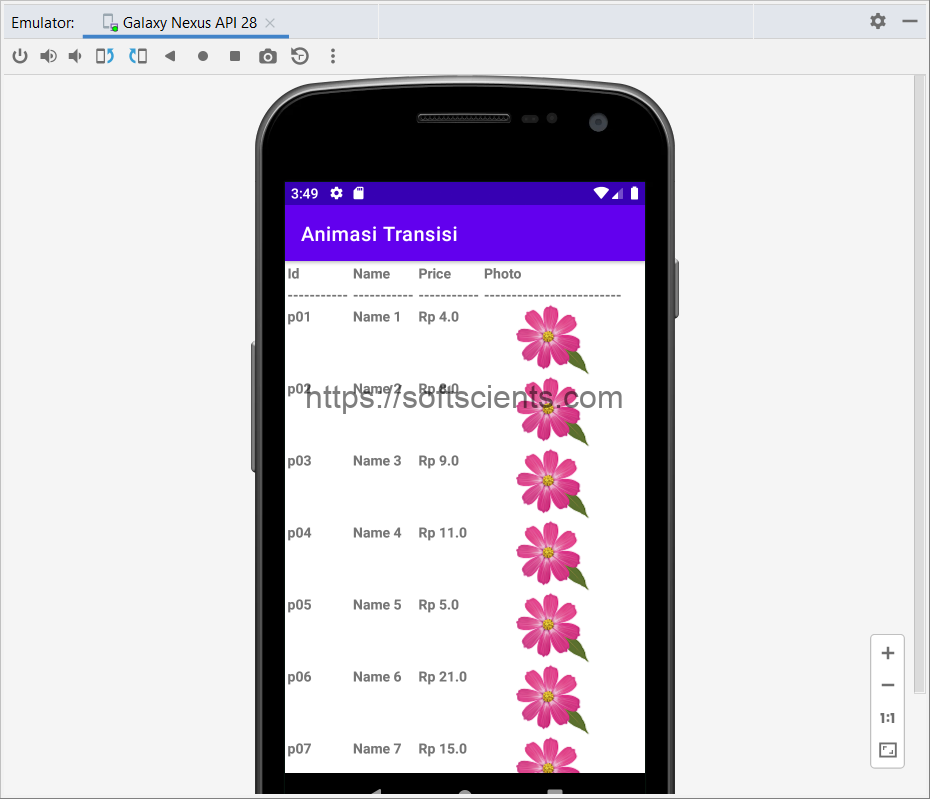
Berikut aplikasi Table pada Android Studio

Menggunakan component datatable
Selain cara diatas, saya juga menemukan component yang dibuat oleh https://github.com/salehyarahmadi/DataTable hanya saja component tersebut belum adanya fitur action listener.
